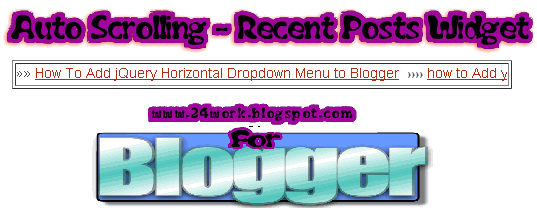
If you have a lot of post on the blog, or if you want to show everyone your list of favorite books, but have little space in the sidebar widget this will be a great help to you. This post explains how to add auto scrolling (marquee) recent posts Widget on his blog that looks good on your blogspot blog. This is similar to the display of recent post in your sidebar, but this will have a marquee in this widget. Now if you want to show your blog in this way, either on top or bottom of your blog, then you can use this new widget:
How to Install Auto Scrolling Recent Posts Widget
I have to write two set of instructions for each steps, as some of you are using the default layout, and some of you are using the new layout. So, let's see how to install this cool widget in your blog..
Step 1:
If you're using the old Blogger interface: Go to Dashboard - Design - Page Elements - Add a Gadget.
Add a Gadget of HTML/JavaScript type.
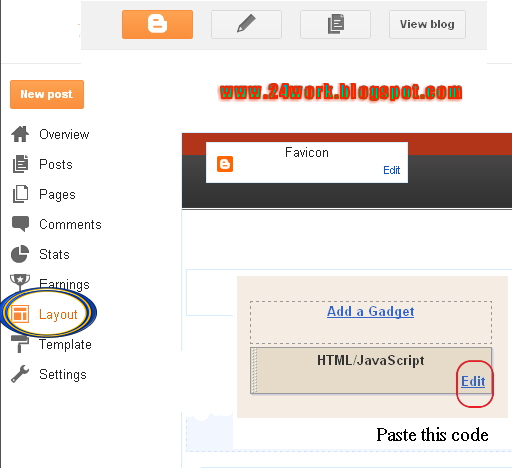
If you're using the new Blogger interface: Go to Dashboard - Layout - Add a Gadget
2.Click on 'Add a Gadget' on the sidebar.
3.Select 'HTML/Javascript' and add the one of code given below
4. Now Click On Save 'JavaScript' You are done.
And now click Save
Note:- Choose appropriate Image Bullet or Icon That have transparent Background and small in Size
You can only modify the code with red color (variables) according to your requirements, for ex. in case of "var w2bScrollDelay", lower the number, higher the speed.
Watch live Demo
How to Install This Widget On 'Blogger' ?
Automatic scrolling Recent posts widget will give scrolling of post titles with links
This widget has automated MARQUEE Effect will result scrolling titles
And now click Save
Watch live Demo
1. Customize Bellow form and Click on Generate button.
2. And Click Add to Blogger button to add this widget to your blog.
How to Install Auto Scrolling Recent Posts Widget
I have to write two set of instructions for each steps, as some of you are using the default layout, and some of you are using the new layout. So, let's see how to install this cool widget in your blog..
Step 1:
If you're using the old Blogger interface: Go to Dashboard - Design - Page Elements - Add a Gadget.
Add a Gadget of HTML/JavaScript type.
If you're using the new Blogger interface: Go to Dashboard - Layout - Add a Gadget
2.Click on 'Add a Gadget' on the sidebar.
3.Select 'HTML/Javascript' and add the one of code given below
4. Now Click On Save 'JavaScript' You are done.
<a href="http://24work.blogspot.com" target="_blank" title="Blogger Widgets"><img src="http://safir85.ucoz.com/24work-blogspot/cursor-24work-10.png" border="0" alt="Blogger Widgets" style="position:absolute; top: 0px; right: 0px;" /></a><script type='text/javascript'>
var w2bWidth="100";
var w2bScrollAmount="10";
var w2bScrollDelay="105";
var w2bDirection="left";
var w2btargetlink="yes";
var w2bnumPosts="5";
var w2bBulletchar =">>>";
var w2bimagebullet="yes";
var w2bimgurl="http://4.bp.blogspot.com/-Dzc4Y6G_iQk/TvngY-SxJiI/AAAAAAAAAvw/Abx5E6KSGkg/s1600/JerryAni.gif";
var w2bfontsize="16";
var w2bbgcolor="FFFFFF";
var w2blinkcolor="FF0000";
var w2blinkhovercolor="3366CC";
</script>
<script type='text/javascript' src='http://safir85.ucoz.com/bdlab-blogspot/24work/scrolling-rece/24work-rpscroller-v3.js' ></script>
<script type='text/javascript' src="http://24work.blogspot.com/feeds/posts/default?alt=json-in-script&callback=w2bAdvRecentPostsScrollerv3&max-results=10" ></script>
<noscript><a href="http://24work.blogspot.com">blogger widget</a></noscript>
And now click Save
Note:- Choose appropriate Image Bullet or Icon That have transparent Background and small in Size
| ScrollAmount: | (0 = No Scroll) |
| ScrollDelay: | (0 = MaxScrollSpeed) |
You can only modify the code with red color (variables) according to your requirements, for ex. in case of "var w2bScrollDelay", lower the number, higher the speed.
Watch live Demo
Demo does not works Properly here, But when we add as widget it Works Great!
How to Install This Widget On 'Blogger' ?
Automatic scrolling Recent posts widget will give scrolling of post titles with links
This widget has automated MARQUEE Effect will result scrolling titles
<a href="http://24work.blogspot.com" target="_blank" title="Blogger Widgets"><img src="http://safir85.ucoz.com/24work-blogspot/cursor-24work-10.png" border="0" alt="Blogger Widgets" style="position:absolute; top: 0px; right: 0px;" /></a><script style="" src="http://safir85.ucoz.com/bdlab-blogspot/24work/scrolling-rece/recentpostsscrollerv2.js"></script>
<script style="" >
var nMaxPosts = 5;
var nWidth = 100;
var nScrollDelay = 105;
var sDirection = "left";
var sOpenLinkLocation = "N";
var sBulletChar = ">>";
</script>
<script style="" src="http://24work.blogspot.com/feeds/posts/default?alt=json-in-script&callback=RecentPostsScrollerv2&max-results=5 " ></script> <noscript><a href="http://24work.blogspot.com">blogger Widget</a></noscript>
And now click Save
Watch live Demo
(Demo does not works properly here, But when we add as widget it Works Great!)
How To Add This Widget :
1. Customize Bellow form and Click on Generate button.
2. And Click Add to Blogger button to add this widget to your blog.
Many thanks to Harish for making this code and I just tested and modified to work on blogger


No comments:
Post a Comment